Maintenance & Troubleshooting
Power & Battery management
Power On and Shutdown procedures
- Power On: Press and hold the POWER button until the rear LED panel fill with green color. The system will proceed through its startup sequence.
- Shutdown: Press and hold the POWER button until the rear LED panel fill with red color.
Power button is located on the Left battery drawer of the robot.
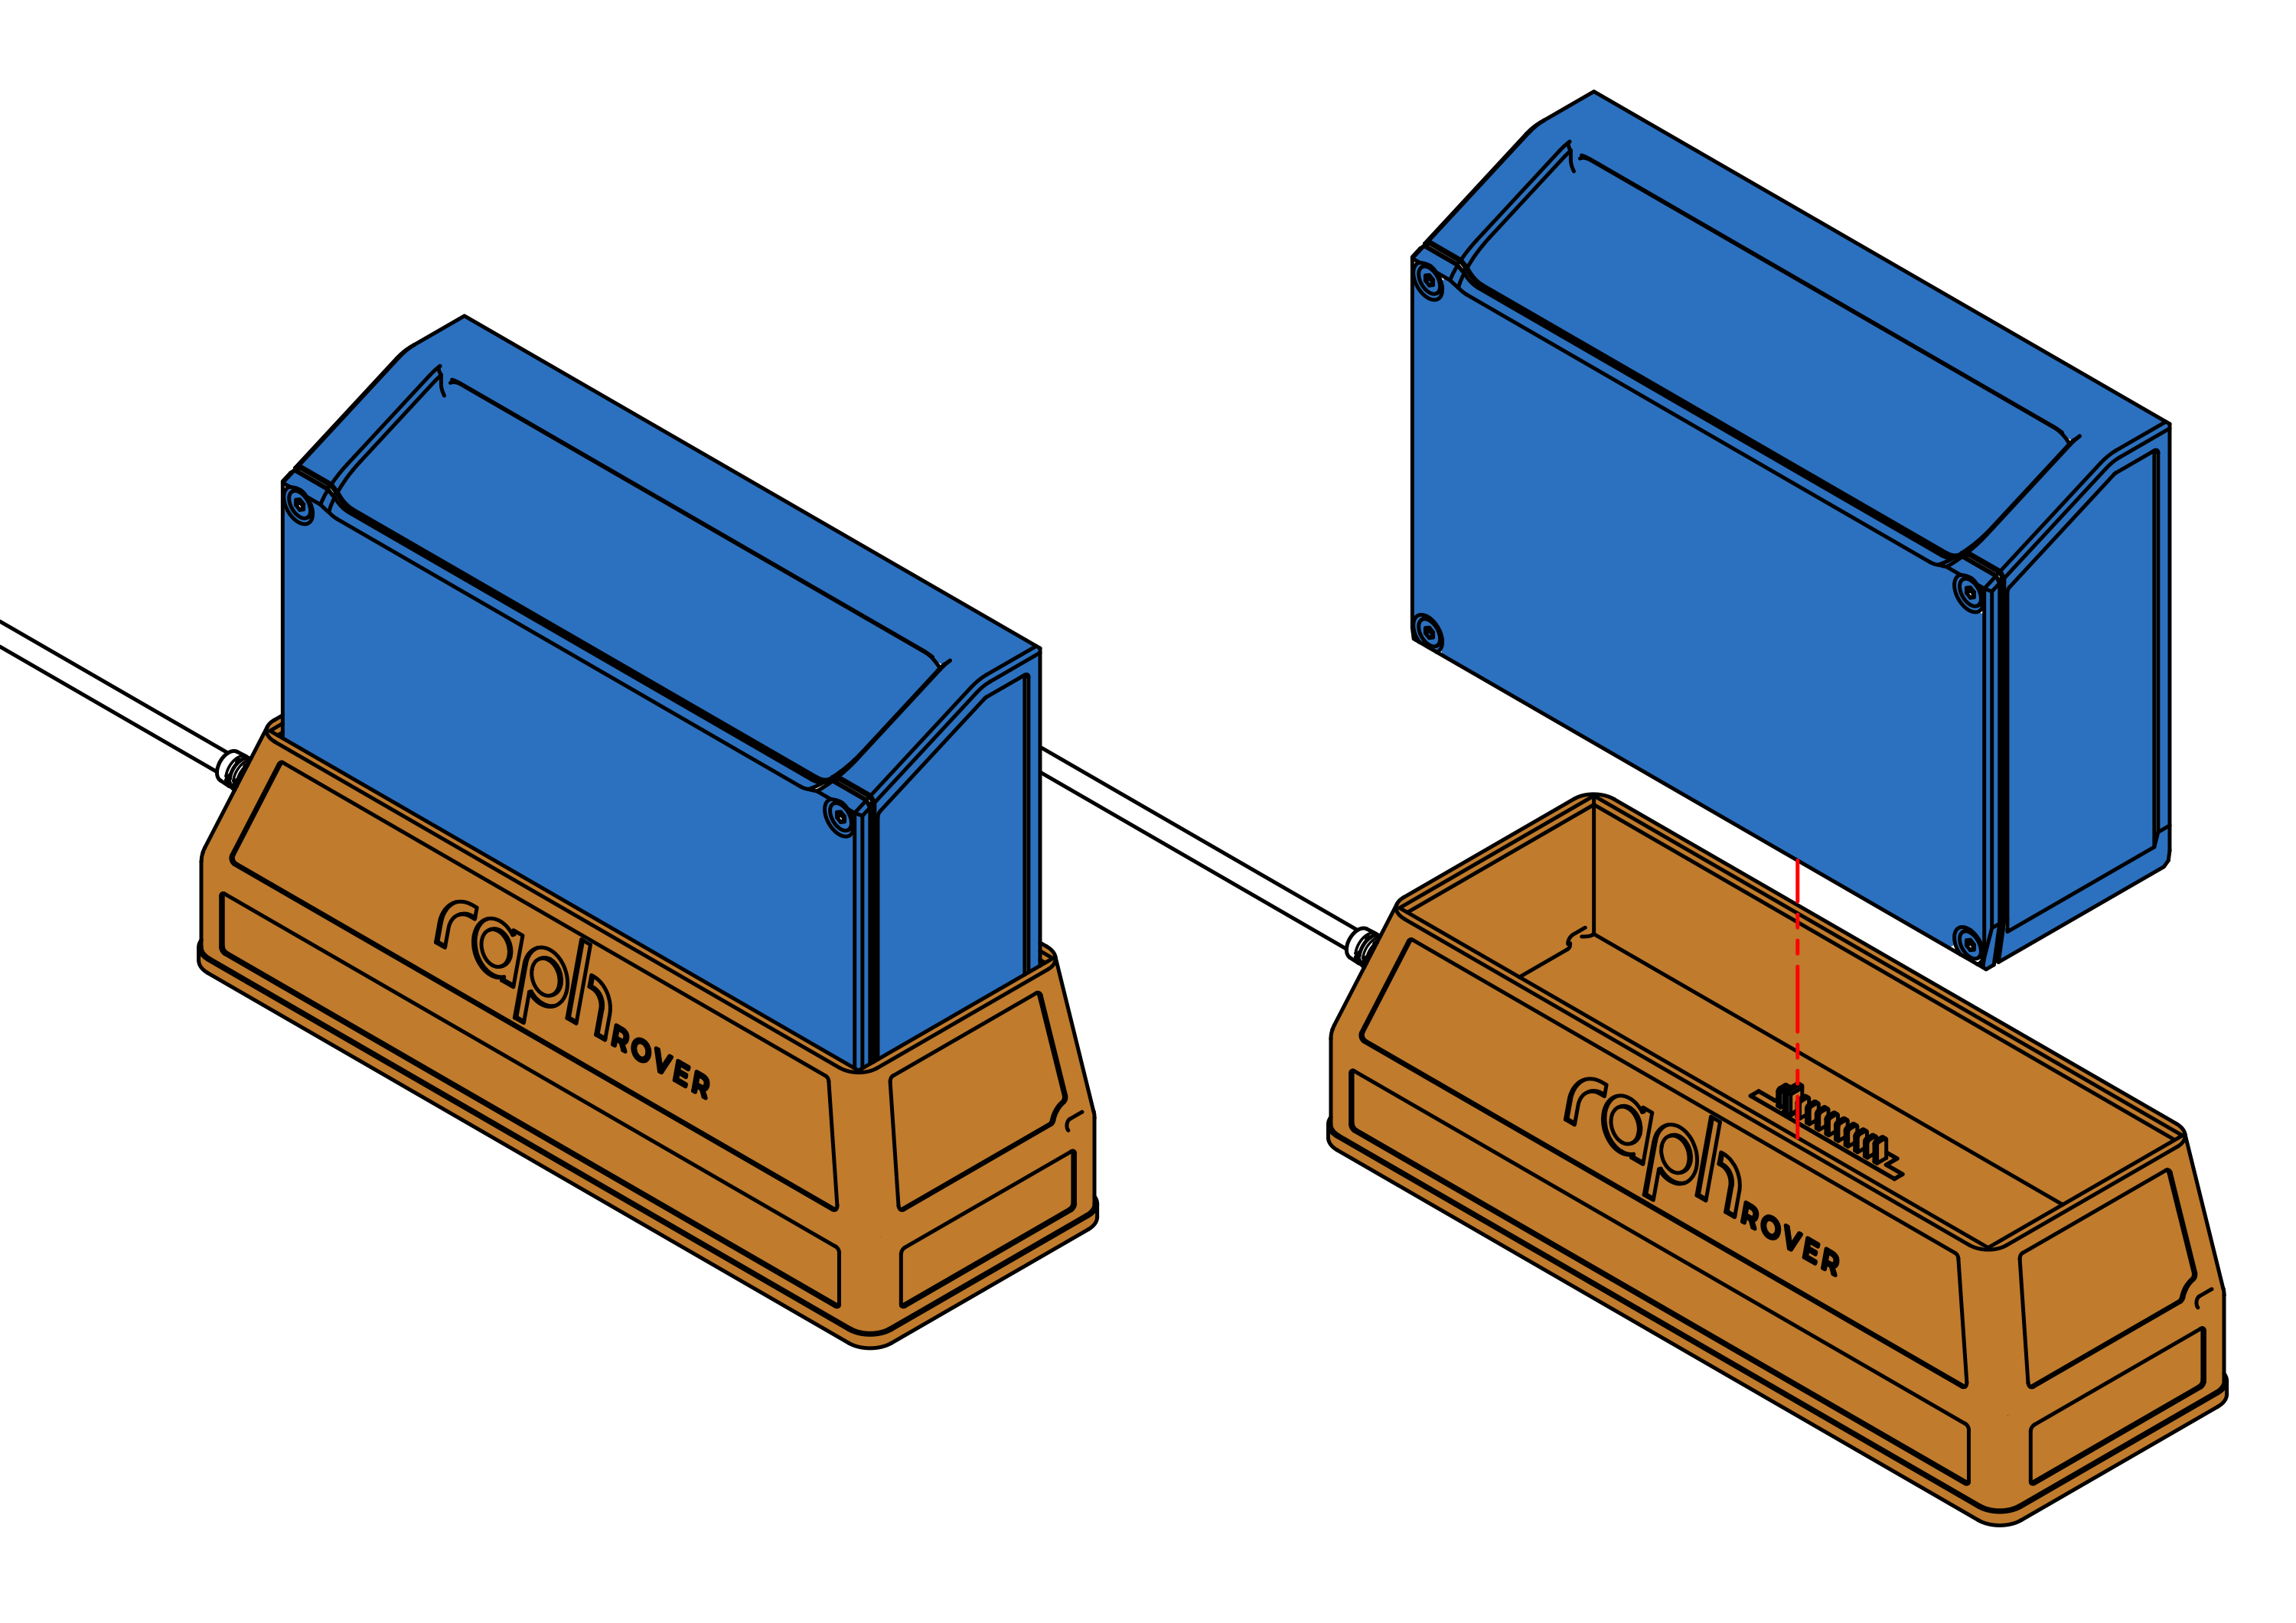
Battery Hot-Swap
The dual-battery architecture of the Raph Rover facilitates hot-swapping, enabling battery exchange without powering down the system.
Before initiating a hot-swap, confirm the following conditions:
- The Rover is stationary on a level surface.
- The battery not being replaced contains a sufficient charge level.
A hot-swap can be performed without second battery while a charger is connected. To prevent overloading the charger, ensure the motors are disabled beforehand.
To execute the hot-swap procedure:
- Remove the depleted battery from its drawer.
- Inspect the battery drawer for any debris and clear if necessary.
- Insert a fully charged battery into the empty drawer.
The side LED panel provides status notifications for battery removal and insertion.
- Removal: Indicated by a red flash.
- Insertion: Indicated by the LEDs illuminating to the current charge percentage of the new battery.

A battery must seat fully within the drawer. Insertion should require minimal force, culminating in a tactile click. If resistance is encountered, abort the insertion immediately and inspect the drawer for obstructions.
Battery Charging
Raph Rover comes with a 4A 25,2V Li-Ion charger. It can charge 1 battery pack in about 1.5 hour via the dedicated charging slot.
The charger (not the dock) is outfitted with an LED status indicator designed to provide information about the charging status of the battery. A green LED signifies that the battery has reached full charge, while a red LED indicates that the battery is currently in the charging process.
As an alternative, the batteries can be charged via the rover, by leaving them inside the battery ports and connecting the charger to the rover's power input located at the back.

This way it's possible to charge both batteries at the same time, however the charging current will be split between them, resulting in a longer charging time of around 2.5 h. The Rover does not need to be powered off for this process.
When working on the rover while charging the batteries the LED indicator of power adapter will not transition to green when charging is complete. Power draw of the rover will keep the charger in active (red) state. To check battery level, press the power button once. Fully illuminated LED side panels will indicate fully charged batteries.
Inspection & Cleaning
Regular inspection and cleaning of the Raph Rover are essential to ensure optimal performance and longevity. Follow these guidelines to maintain your rover:
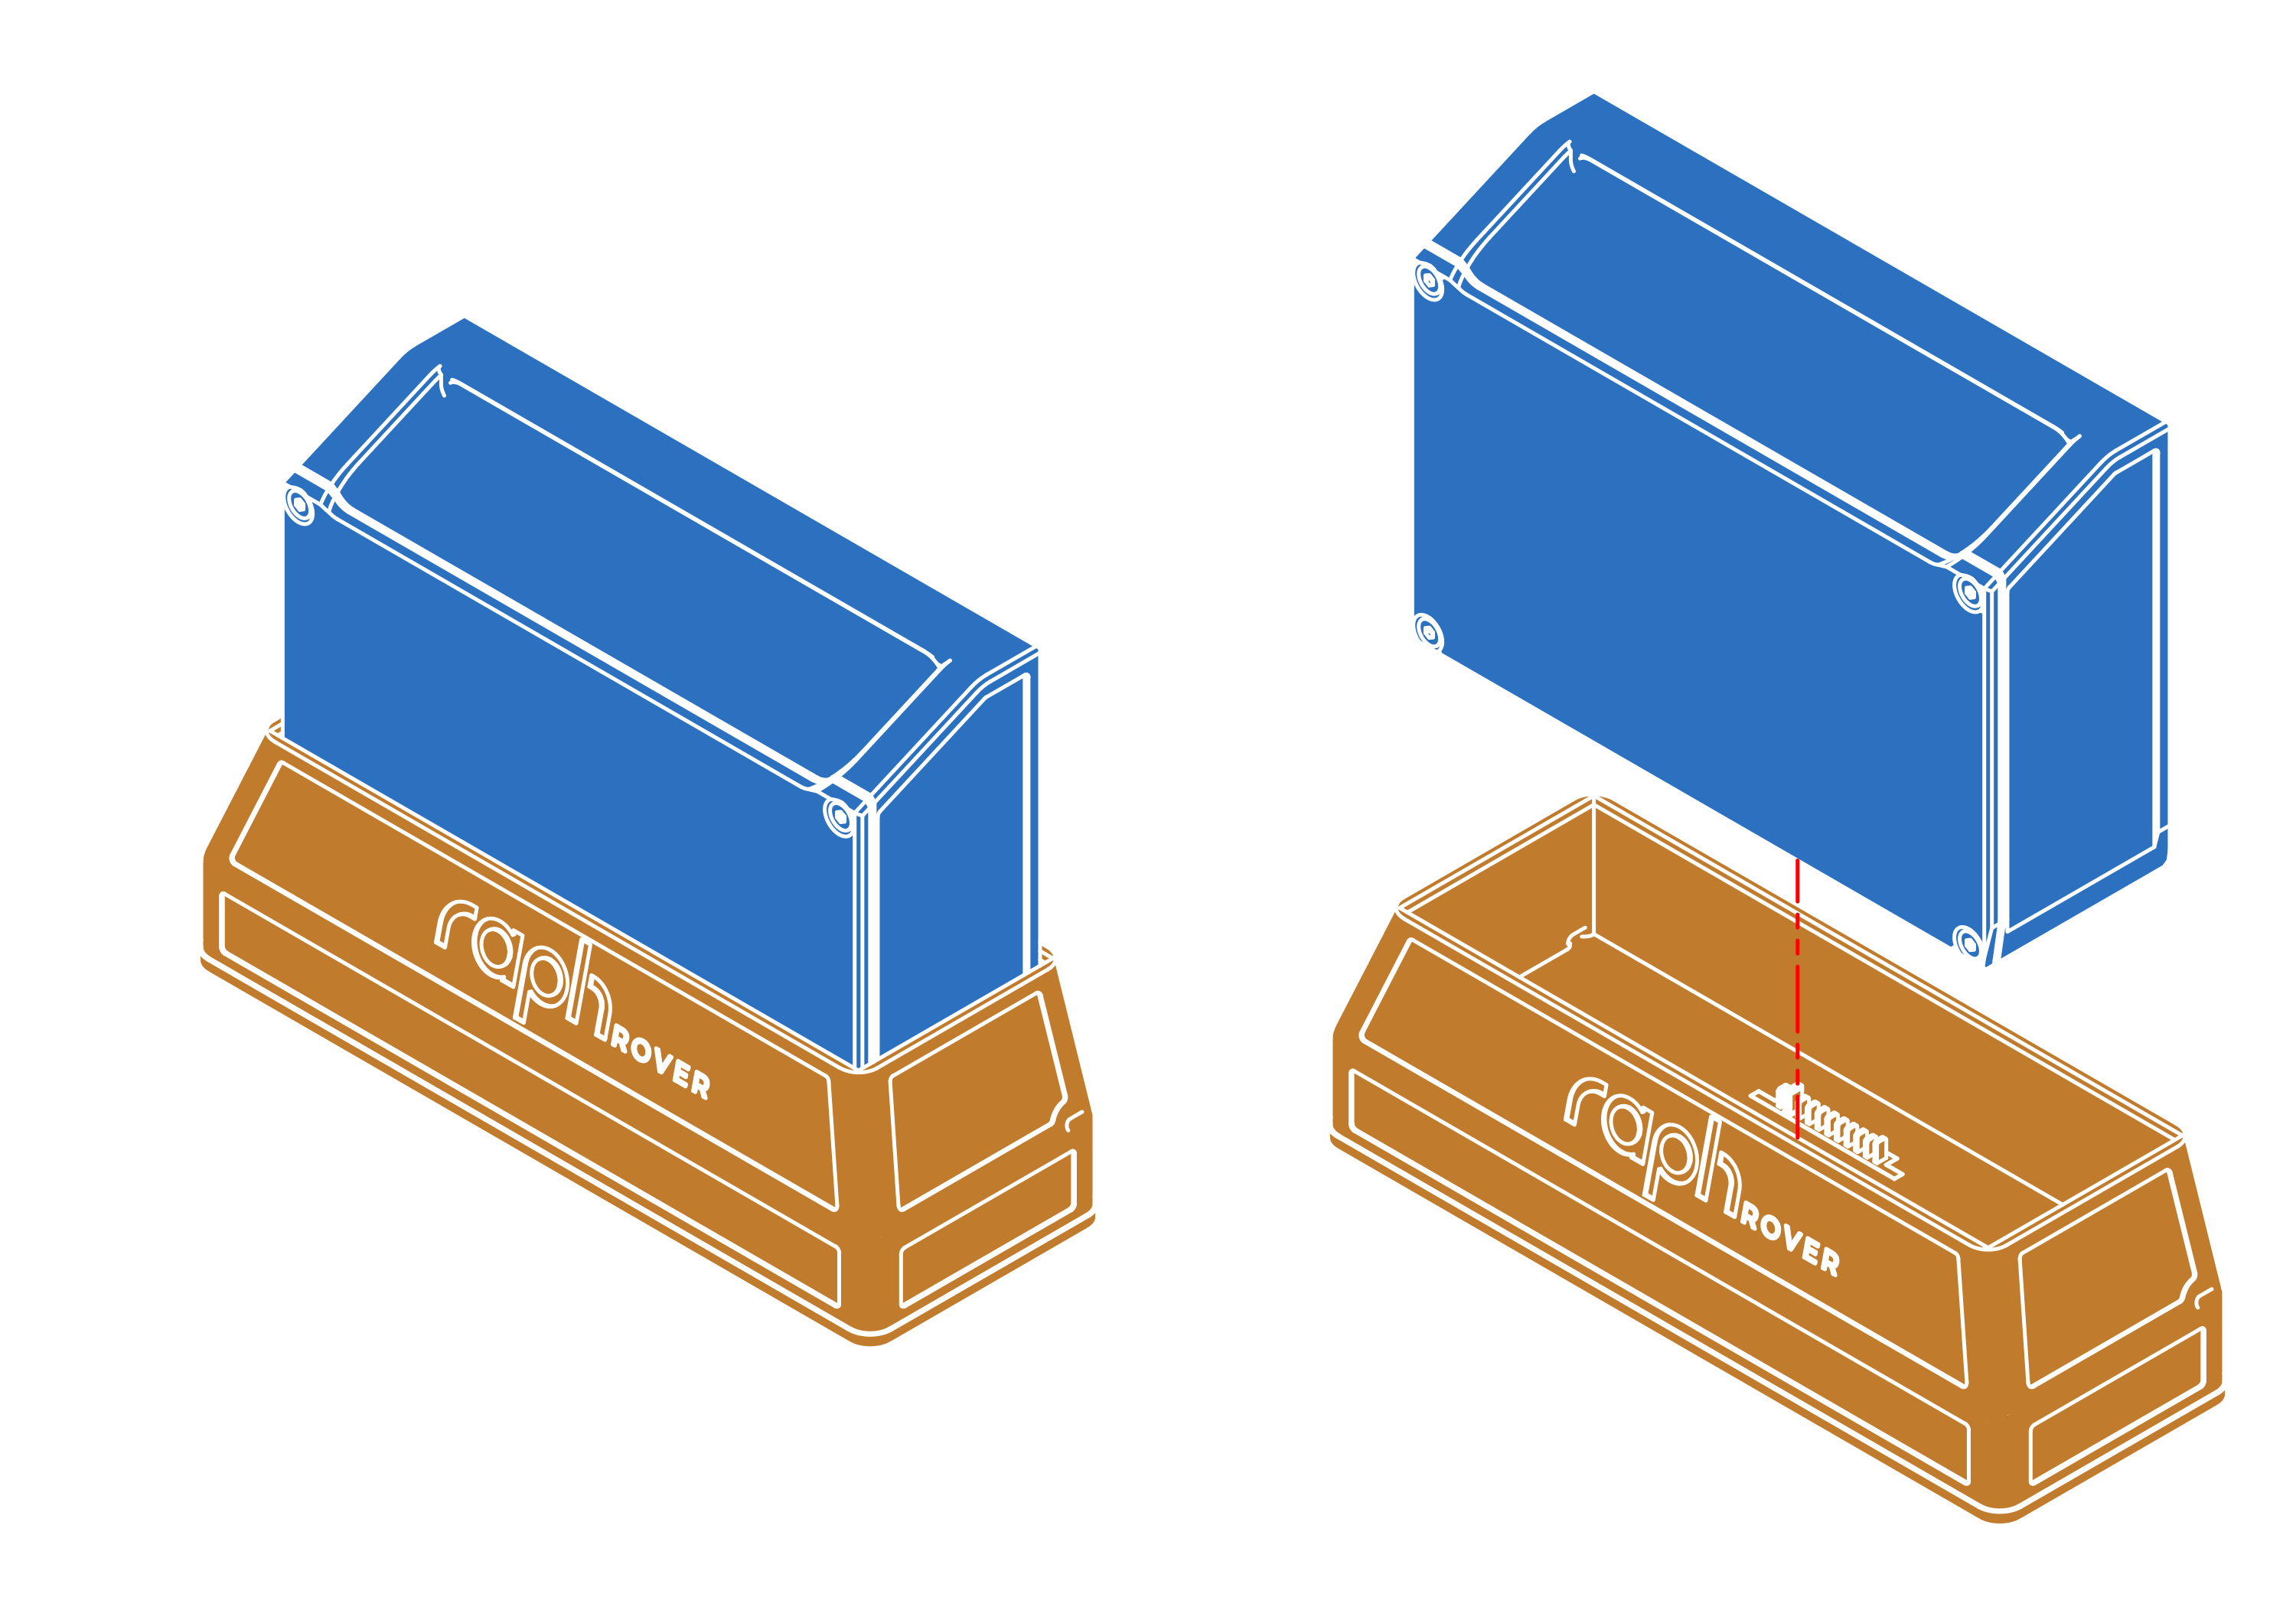
Internal inspection
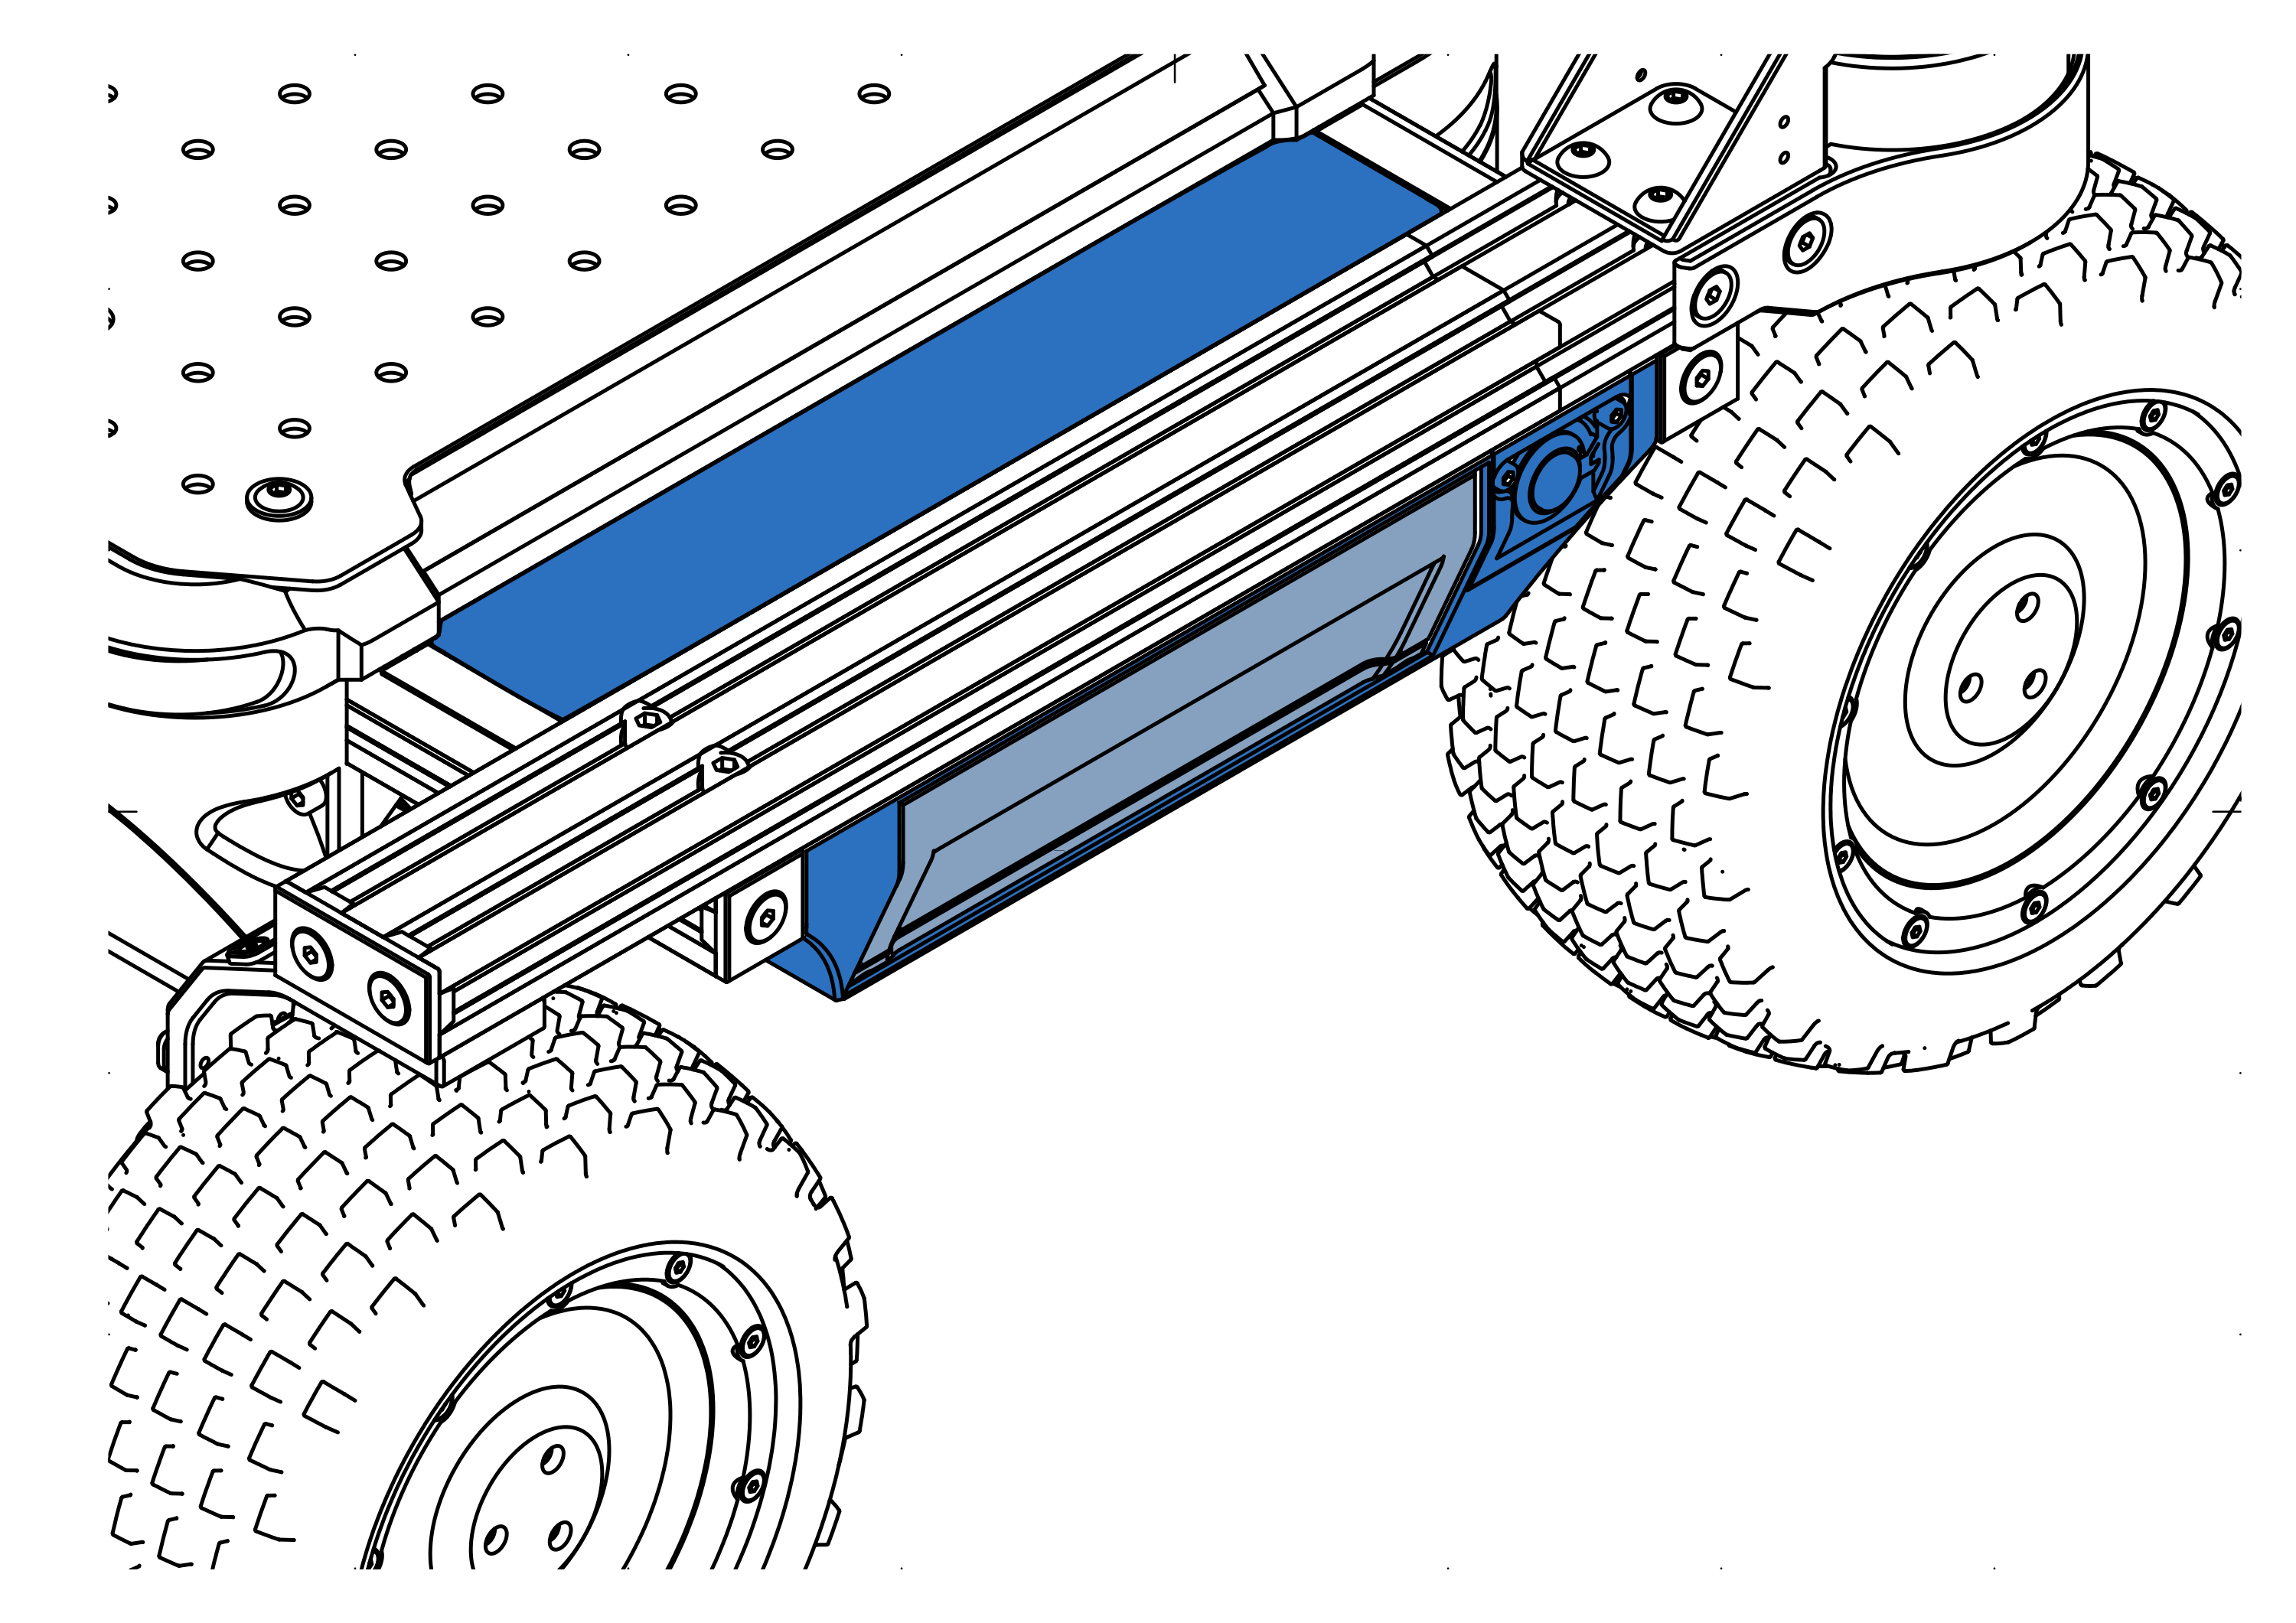
To inspect the internals of the rover it is required to dismantle payload and electronics cover.
Before dismantling ensure that the robot is:
- stationary on a level surface,
- powered off and batteries removed.
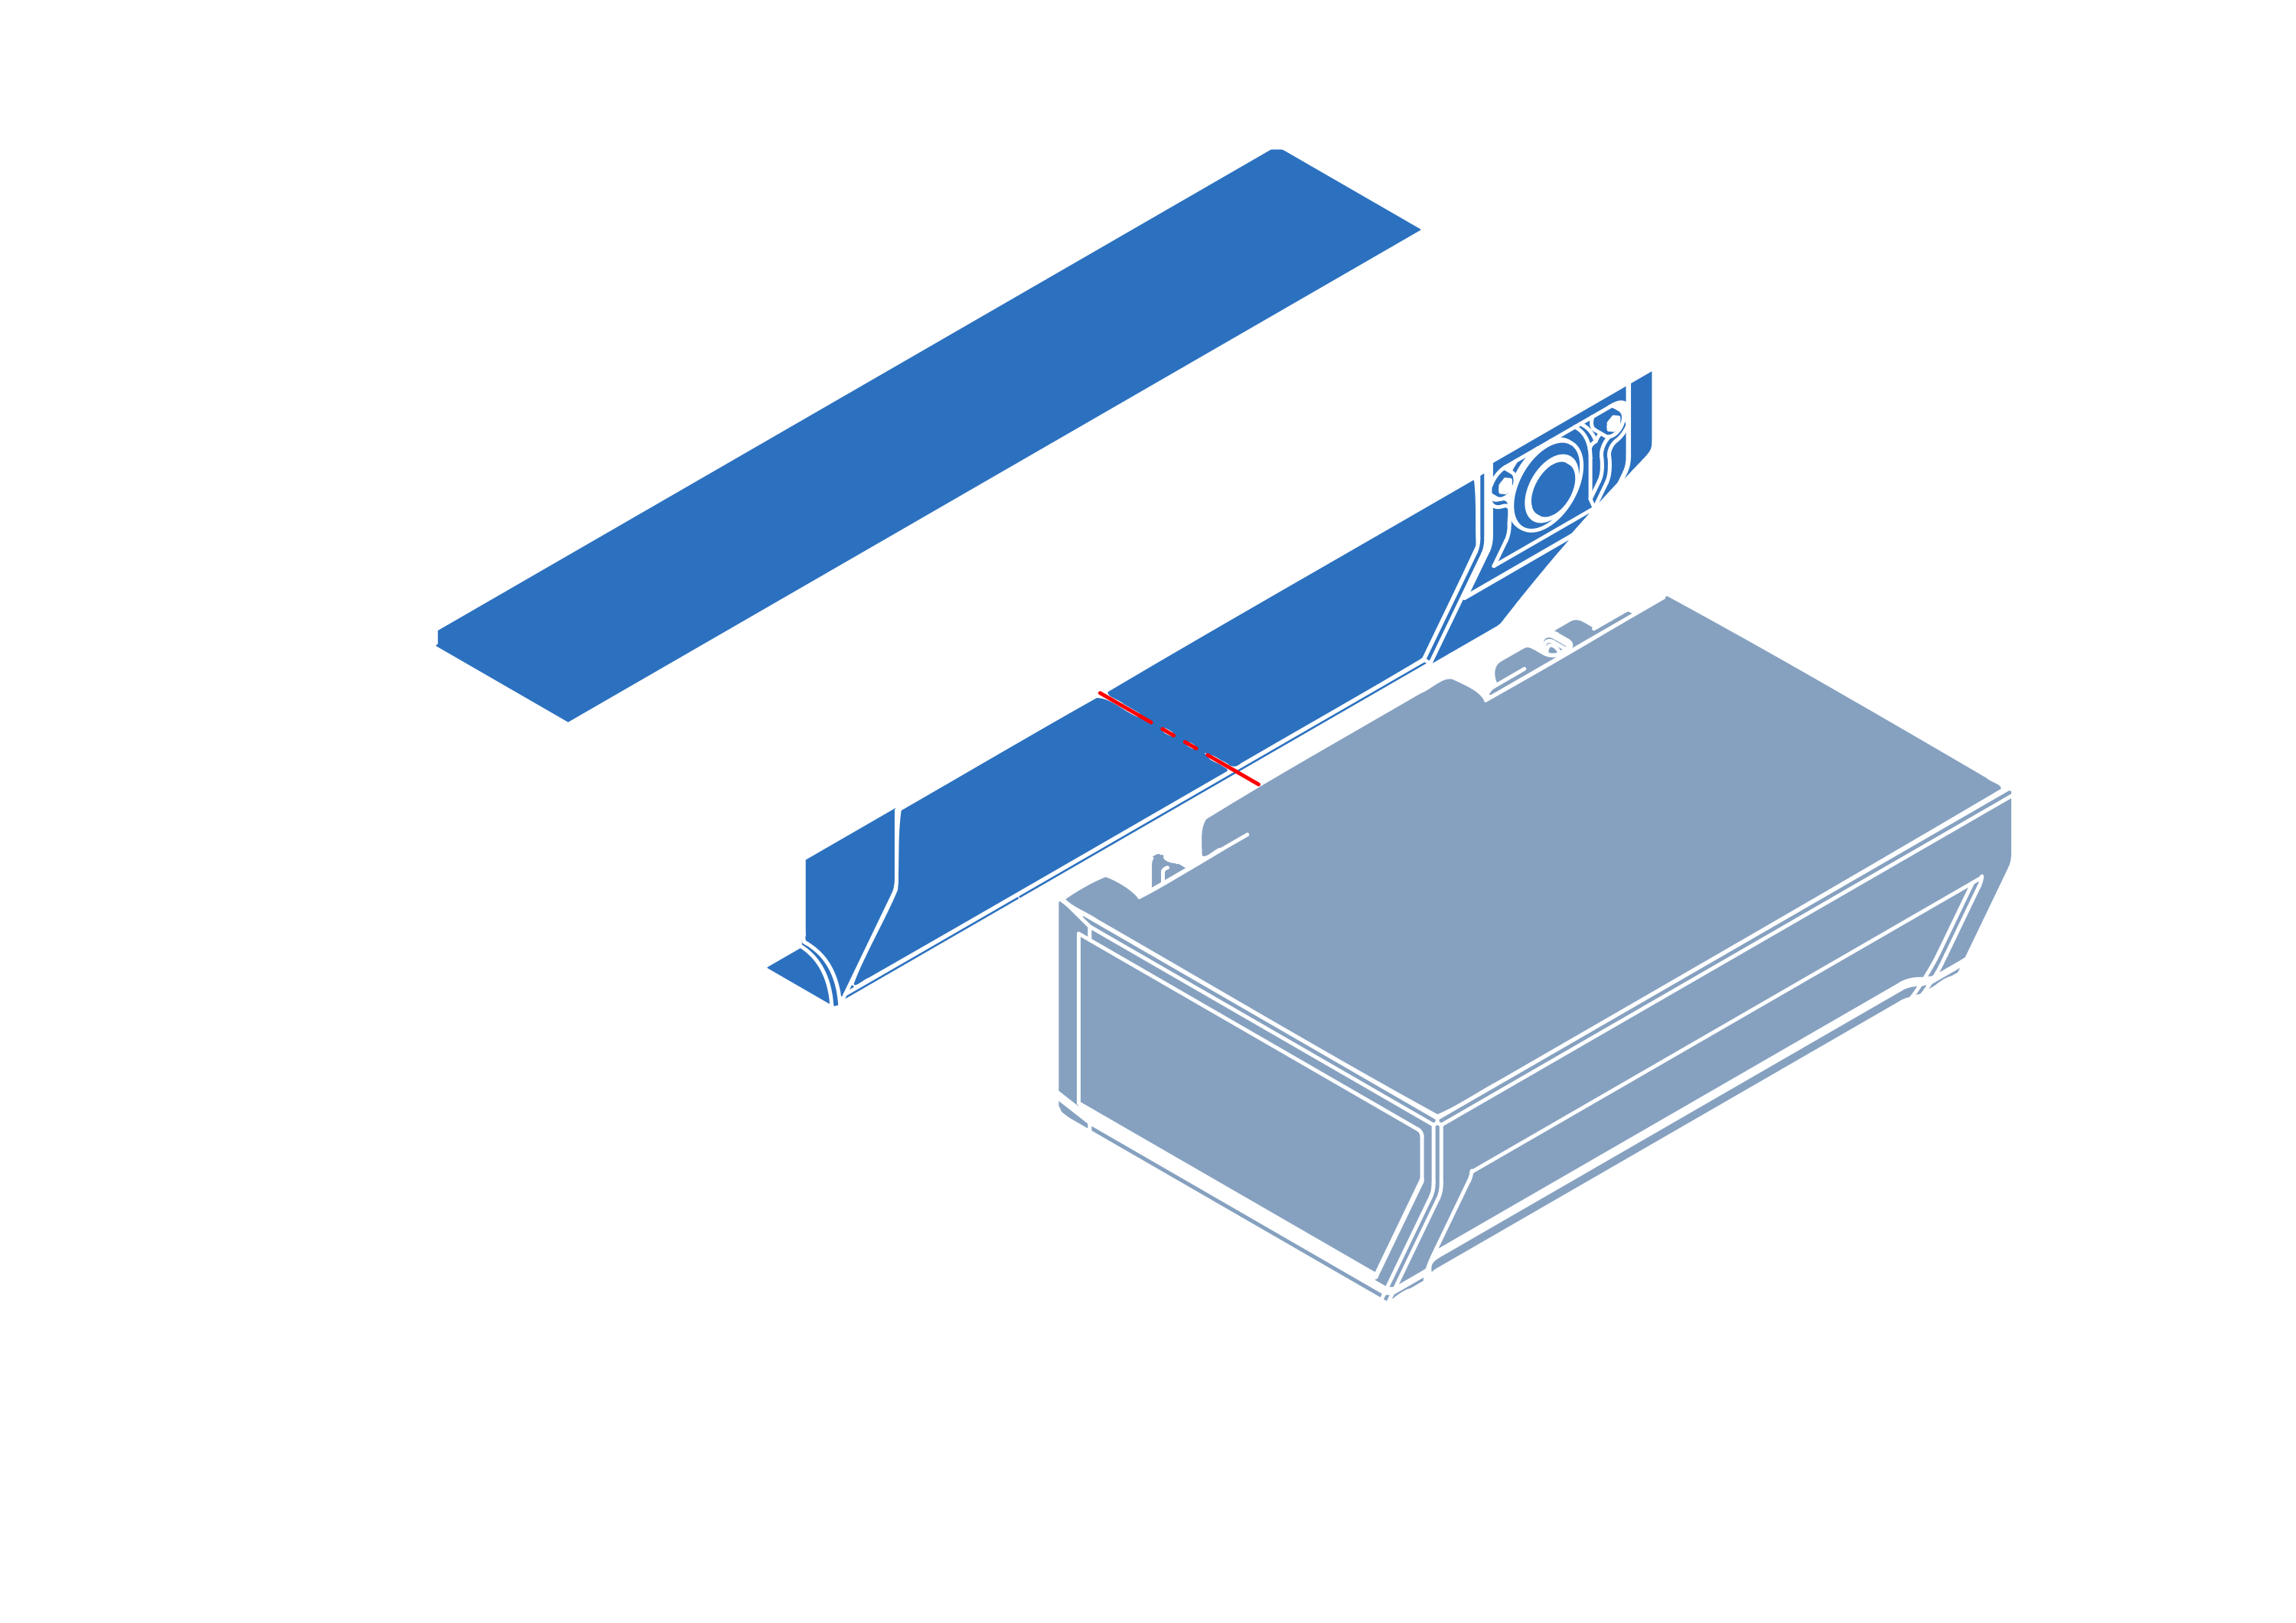
To open electronics bay:
- Unscrew the payload mounting plate (4 M5 round head screws).
- Remove the payload mounting plate.
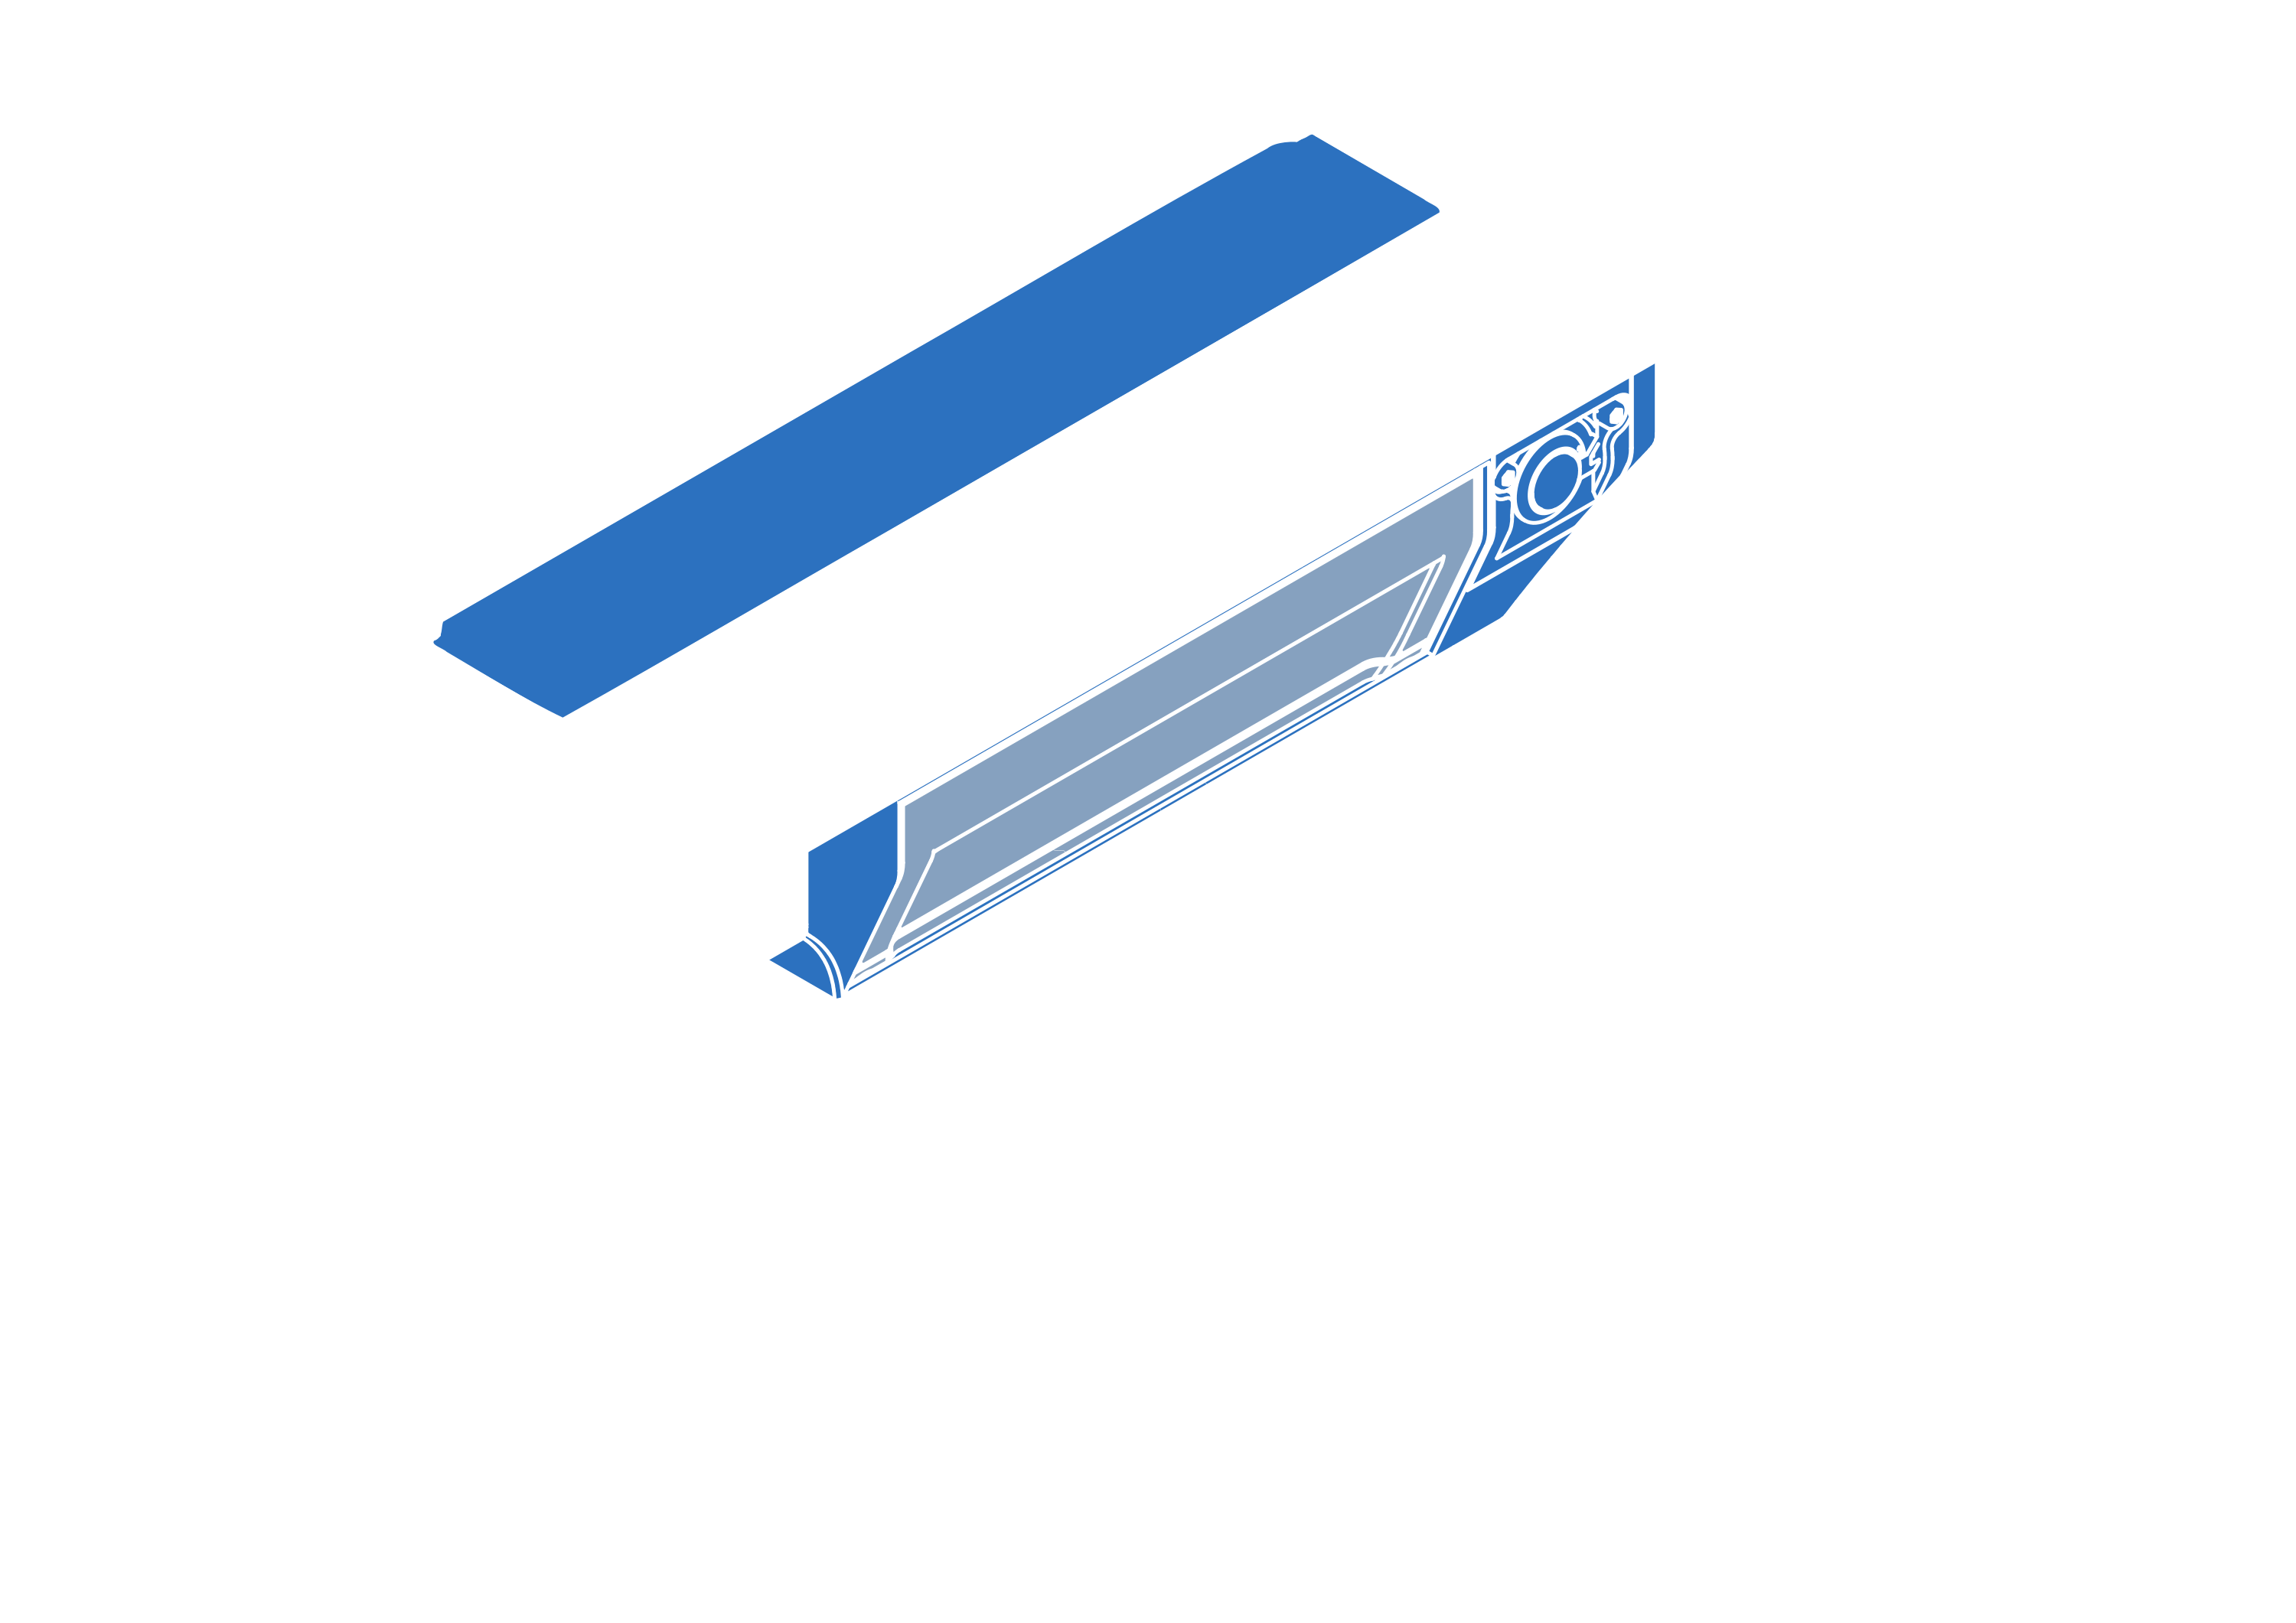
- Unscrew 6 torx screws next to the side LED panels.
- Remove top electronics cover (you can use handle next to the lidar).
- Inspect for any loose cables water ingress etc.
Electronics removal
In case of serious problems or issues with the robot it is possible to remove whole internal electronics from the robot. It can be helpful with debugging problems.
Before dismantling ensure that:
- top electronics cover is removed,
- robot is stationary on a level surface,
- robot is powered off and batteries removed.
To remove internal electronics follow instructions below:
- Unplug all cables connected to the internal electronics
- Interface panel (Power, USB & Ethernet)
- All of the motors
- Batteries
- Lidar
- OAK-D camera
- Power & Control buttons
- Antennas
- Unscrew the front cover (2 screws below the front LED panel)
- Remove the front cover
- Unplug the USB-C cable from the OAK-D camera
- Rotate the robot upside down
- Unscrew 8 torx screws on the bottom of the robot
- Carefully remove the floor with electronics